This guide will show you how to set up a fully encrypted Linux system on your SSD and use a small partition of the same SSD as a cache for your HDD. Naturally, also fully encrypted.
Firstly, we have to choose an operating system. If you want to follow the guide, I would advise you to use a Linux distribution based on Debian, like Ubuntu or elementary OS. I choose for myself elementary OS 0.4 Loki. It is a very neat distribution with a design inspired by macOS and it is based on Ubuntu 16.04. Therefore, you can of course also go with Ubuntu 16.04 LTE. If you choose to use the latest version of any of these systems or a different one, part of this guide or the guide in its entirety might be different or not working at all.
Let’s begin with the device: Your PC should have an HDD (the larger the better) and an SSD with at least 128GB of storage. If you have an old SSD with less than that, can of course also follow this guide, but in the end, you should think of placing the root of your distribution instalment on the HDD instead of the SSD like I will describe in this guide later. In my device, the HDD came with my Laptop and the SSD was later added by myself for additional speed. Thus the HDD is mounted at
/dev/sda
and the SSD at
/dev/sdb
.
1. Before the installation
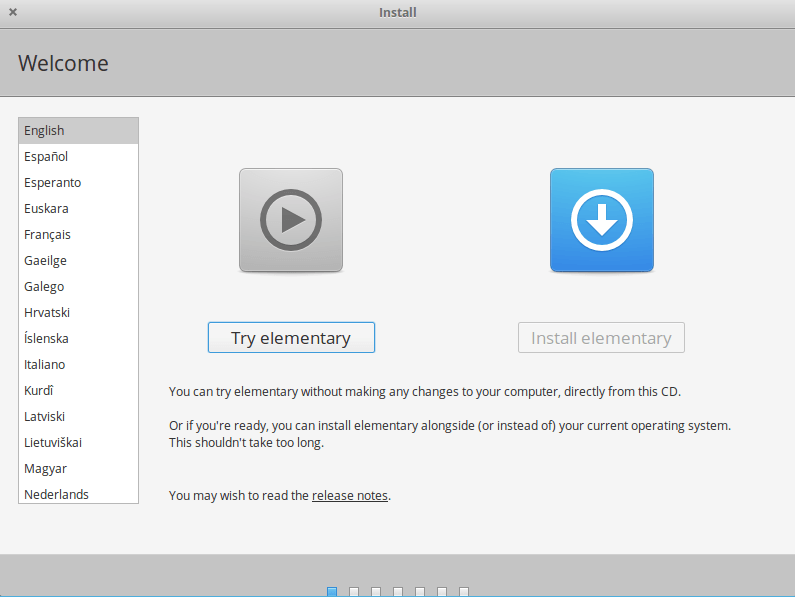
When you have decided for a distribution – I hope you choose elementary OS as well and decided to donate/pay something to the developers because these guys doing amazing work – you should create a live-USB-stick or a live-CD/DVD, put it into your device and start it. After that, you will choose “try elementary”. Don’t go directly into the installation because we need to set a few things up before over the terminal. After the elementary OS desktop is visible (nice, right?) we open the terminal with win + T (or alt + ctrl + T). And go into supervisor mode with the command
sudo -i
.
To see a list of the installed disks use the
fdisk -l
command.
Afterwards, we define some variables to not get confused:
export SSD_POINT=/dev/sdb
export HDD_POINT=/dev/sda
Of course, change the values for the respective values in your device. To access the variables later, we have to put a $ in front of the names. Like:
echo $SSD_POINT
.
1.0 Wiping (optional)
We use LUKS later for the encryption and use /dev/urandom to make the encryption itself safe. But if you are very concerned with the security of your data, you should think of overwriting your disks before you proceed. Some people say, that it is enough to overwrite the disks with zeros (faster) others say you should use random data for that (slower). Why do we need that, if our encryption itself is already randomized? Well, imagine we have a 10-byte disk and we overwrite it with zeros: [0000000000]. Now we create a 4-byte partition on it, which is LUKS encrypted. Our disk could now look like this: [00 AFCA 0000]. An attacker could now find the part on the disk, which is encrypted, much easier as if the whole disk is full of random data to begin with. The same goes for an unwiped disk. A disk with data on it has a pattern, the random part of the encrypted should not have one. Therefore, an attacker is able to locate the encrypted part.
In my case, I was concerned on the wear on my SSD and only used this method for testing purpose. Thus I did not wipe my disks before setting up my system. Additionally, a normal attacker should not be able to decrypt the encrypted LUKS partition to begin with, even if it is found. But if you have any sensitive data on your device or want to make the device as secure as possible, you should overwrite the disks before you continue.
To overwrite your disks safely you can use the dd command. It is important to choose the right device because it will completely and irrevocable wipe all data (that’s the point, right?) on the selected device. You should also consider, that it can take hours to safely overwrite a whole disk.
[Faster] To overwrite the disks with zeros use:
dd if=/dev/zero of=$SSD_POINT || dd if=/dev/zero of=$HDD_POINT
[Slower] To overwrite the disks with random data use:
dd if=/dev/urandom of=$SSD_POINT || dd if=/dev/urandom of=$HDD_POINT
1.1 Partitioning
In this guide, we use the whole SSD and HDD drive for the partitions. Because we want to encrypt our whole system, we have to put our
/boot
mount point outside of the normal partition. Next to that, we need two other partitions on the SSD. One for our cache (small) and one for our actual system (large). On the HDD one partition is enough. You could make more than one, that is entirely up to you. Because we use LVM, we can later put as many partitions as we like together in our volume, but later more.
To create a partition we use the gparted tool from your preinstalled applications. You can start it from the terminal by simply calling its name
gparted
.
The first thing to do is to create for both devices a new partition table with the type gpt. You can find the settings under Device -> Create Partition Table… and there select gpt and Apply.
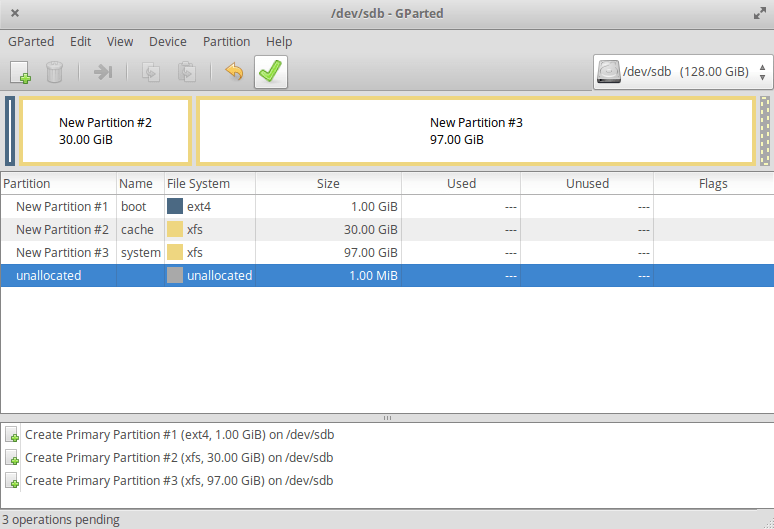
Now we create our swap partition. Remeber were your SSD and HDD was. Change at the top right corner to your SSD and right click on the unallocated partition and select New. Our boot partition should be around 512-10254MiB big and in the file system ext2 or ext4. Let’s create a 1024MiB boot partition with the file system ext4:
Finally, use Add to create it. Now we need a cache partition. With the 128GB SSD, I choose 30GiB (30GiB = 1024 MiB * 30 = 30720 MiB) for the cache for the HDD and the rest of the Linux system. In the following, use always xfs for your partitions as a file system. XFS can be enlarged, like ext4, but not made smaller. Still, from the articles I read, XFS should be preferred over ext4 due to its cleaner code, and stability. When every partition is created, press the green hook in the toolbar of gparted.
Close gparted afterward.
To store our partitions, we create new variables (change them to your values):
export SSD_BOOT=/dev/sdb1
export SSD_CACHE=/dev/sdb2
export SSD_SYSTEM=/dev/sdb3
Important: If you use UEFI instead of legacy/bios you want to create two partitions for
/boot
. One for the
/boot/efi
(file system: fat32 (!) ) mount point at
/dev/sdb1
and a second one for the normal
/boot
(file system: ext2) mount point at
/dev/sdb2
.
1.2 Setting up caching with bcache
A cache is a faster storage to keep often used (or lately used) data from a slower storage. A modern system uses a caching system like this:
CPU Cache [ L1 > Ln ] (extremely fast) > RAM (very fast) > SSD Cache (optional) (fast) = SSD storage (fast) > HDD storage (normal) > Server storage (slow)
To create a cache in Linux we use bcache. Bcache is a Linux kernel block layer cache which allows exactly what we want: Cache our slow HDD with part of our fast SSD.
To enable it, we first have to install bcache-tools. For this, it is mandatory, that you have an active internet connection. Afterwards, wipe anything from the newly created partitions:
apt-get update
apt-get install bcache-tools
# wipe partitions
wipefs -a $SSD_CACHE
wipefs -a $HDD_POINT
Then set up the cache partition (-C) of the SSD and the backing device (-B), the HDD partition and (optional) tweak bcache to use the writeback caching mode. Finally, add the resulting mapped partition of the cache on the SSD and the data partition on the HDD to a new variable.
make-bcache -C $SSD_CACHE -B $HDD_POINT
# optional
echo writeback > /sys/block/bcache0/bcache/cache_mode
export BCACHE=/dev/bcache0
In Linux shell, the command
echo 1 > test
writes a parameter (1) into a file (test). If you want to append a parameter to a file, you have to use
echo 1 >> test
. To see what you have done, you can use
cat test
. It will write the content of the file into the terminal (in this case 1 1). To delete this file again use
rm test
. If you want to delete a folder, you can use –r and if you want to delete forcefully, add -f.
rm -rf dir
will delete the whole dir. Be careful: in root mode (sudo), you can remove everything.
rm -rf /
for instance, will remove your whole Linux system.
1.3 Setting up encryption with LUKS
Our whole file system of the HDD together with the cache on the SSD is now mapped to $BCACHE (/dev/bcache0) and the system partition still at $SSD_SYSTEM. Now we have to encrypt it. To setup LUKS we first have to create an Format. We use the default settings but alter the key size for more security. If you want to learn more about LUKS you can read it at the excellent archlinux wiki. Choose a secure and long password. As always: A encryption is at most as secure as the password. After that, we can open it and give it a name which it will be mapped to. Finally, we save the path again in a variable for later use.
# encrypt everything except /boot
cryptsetup --key-size 512 luksFormat $SSD_SYSTEM
cryptsetup --key-size 512 luksFormat $BCACHE
# open devices for installation
cryptsetup luksOpen $SSD_SYSTEM cRoot
cryptsetup luksOpen $BCACHE cCache
# store the path again in variables
export CROOT=/dev/mapper/cRoot
export CCACHE=/dev/mapper/cCache
Now we have our HDD and SSD fully encrypted.
1.4 Creating Logical Volume Manager (LVM)
To install Linux on the decrypted partitions, we need to format them. LVM is a very useful tool for that. You can group a large number of partition into one volume group. Also across physical devices. In this volume group, you can freely create, remove and resize logical partitions. This is very useful for all kind of stuff. You can read more at the again excellent archlinux wiki.
First, create a volume group with the name system for our Linux system root on the SSD. After that, create a volume group data for our HDD partition.
# create the LVM on a physical volume
pvcreate $CROOT
# create a volume group from numerous different physical volumes (only one in our case)
vgcreate system $CROOT
# now the same for the cache and HDD
pvcreate $CCACHE
vgcreate data $CCACHE
1.5 Creating logical partitions
In the last step before the begin of the installation, we have to set up the logical partition we want to install our system in. To create a logical partition in a existing volume group we use the command
lvcreate -n[name] -[l,L][size] [name of volume group]
. The name of the new partition is set after the -n parameter, the size after the -L. You can also choose to set a percentage size with the -l. For example, the command
lvcreate -n test -l 50%FREE data
will create a partition on our data volume group with the name test and the size of 50% of the left free space.
1.5.1 Swap
Your total swap should be around 0.5 * RAM. 1.5 * RAM if you want to use hibernation.
We want to use hibernation, thus we need 1.5 * RAM. Swap is very slow in comparison with physical RAM. If your swap is used, you will immediately notice, that your system slows down. To make it faster, we create a partition for the swap with a size of 0.5 * RAM on the SSD. The 1 * RAM will be on the HDD and should only be used for hibernation. In my case, I have 8GiB RAM. Thus, 4096 MiB swap will be on the SSD and 8192MiB will be on the HDD.
Creating this is pretty easy because of the LVM:
lvcreate -n swap -L 4G system
lvcreate -n swap -L 8G data
1.5.2 System
Now we can set up the partition for the system. We will split the partition for
/root
and
/home
into two different partitions. With that, we can change the size of home without touching the root part of the system. Additionally, we use not the full space of the volume group to have the option to add later a new partition (or expand an old one) if need be.
lvcreate -n root -L 26G system
lvcreate -n home -L 30G system
Additional partition on our HDD we completely ignore for now, because we can create them at any time easily through the LVM.
2. Installing Linux
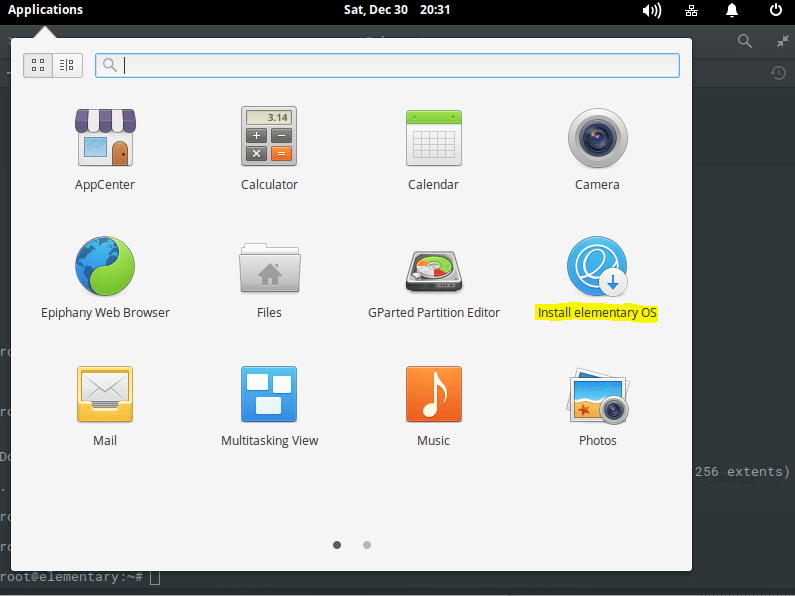
Finally, we install Linux. Start the application Install elementary OS or similar name for Ubuntu from your application drawer.
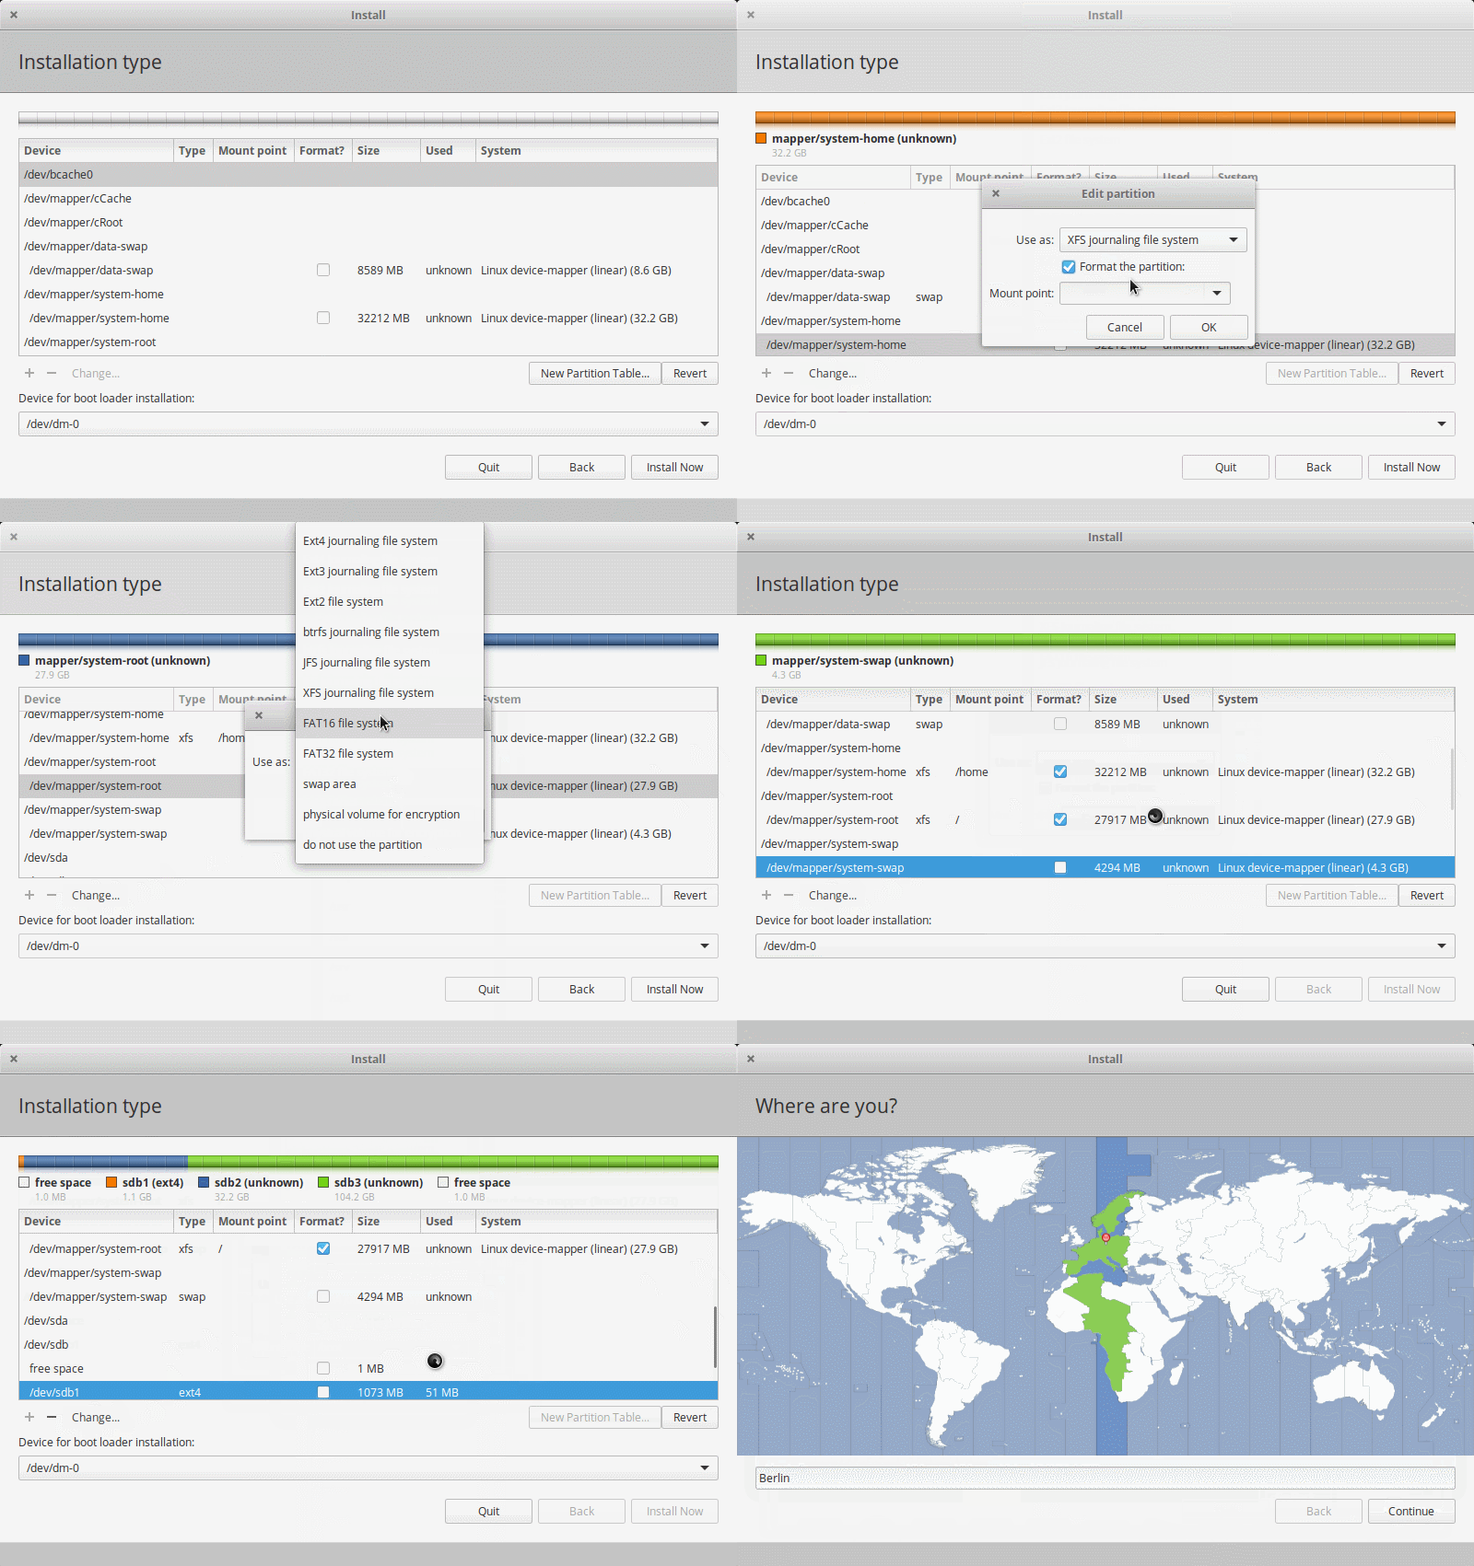
Continue through the installation process with the settings you like until it asks you for the Installation type. Choose Something else. After this, you will come to a window like gparted before. Here you can set file system, the option to format it and the mount point. We have 5 partitions we want to use:
-
/dev/mapper/data-swap
Use as: swap area -
/dev/mapper/system-home
Use as: XFS journaling file system
Format the partition: True
Mount point: /home -
/dev/mapper/system-root
Use as: XFS journaling file system
Format the partition: True
Mount point: / -
/dev/mapper/system-swap
Use as: swap area -
/dev/sdb1
Use as: Ext4 journaling file system
Format the partition: True
Mount point: /boot
Finally, choose
/dev/sdb
as the device for boot loader installation.
Press Install Now, then Continue, choose your location, set your keyboard layout and finally set up your account. It is not necessary to encrypt the home partition because it is already encrypted. Also, you can choose to automatically log in, because we need to unlock the device anyway before we can use it.
Don’t reboot the system after the installation! Choose Continue Testing.
3. After the installation
Now that the installation is over, we have to make sure, that our system is able to use the cache and understand the encryption. Therefore we have to mount the freshly installed system to install the caching kernel and setting the encryption up. Afterwards, a nameserver has to be added to get internet access and bcache-tools must be installed. Finally, the encrypted partitions have to be added to the system. Return to your open terminal. If it is closed, start a new one and change to the supervisor mode again.
mount /dev/mapper/system-root /mnt
mount $SSD_BOOT /mnt/boot
mount -o bind /sys /mnt/sys
mount -o bind /run /mnt/run
mound -o bind /proc /mnt/proc
mount -o bind /dev /mnt/dev
# change to be root in the installed system
chroot /mnt
# set up a namerserver to get internet access
echo 'nameserver 8.8.8.8' > /run/resolvconf/resolv.conf
# install bcache-tools
apt-get update
apt-get install bcache-tools
# Create /etc/crypttab and add your encrypted partitions
echo "cRoot UUID=`blkid -o value $SSD_SYSTEM | head -1` none luks" > /etc/crypttab
echo "cCache UUID=`blkid -o value $BCACHE | head -1` none luks" >> /etc/crypttab
# Very important: update your initramfs. Otherwise it will not load the crypttab
update-initramfs -uk all
Now, you are almost finished. Exit the chroot, sync the system state and unmount. Afterwards, deactivate the volume group and close the LUKS partition. Then reboot an enjoy.
# exit chroot and sync changes
exit
sync
# unmount the system
umount /mnt/sys
umount /mnt/run
umount /mnt/proc
umount /mnt/dev
umount /mnt/boot
umount /mnt
# turn swap off to deactivate the volume groups
swapoff -a
vgchange -an /dev/mapper/system
vgchange -an /dev/mapper/data
cryptsetup luksClose cCache
cryptsetup luksClose cRoot
sync
reboot
4. Source
I followed the steps from solsTiCe@askubuntu and change them for my purpose.
This was my first guide. If you have any questions or want to give me feedback, please feel free to leave a comment.
In the next guide, I will show you how to unlock the HDD partition automatically and optionally unlock the SSD Root partition with an USB-Stick instead of a password.




1 Comment
Andy · 19th April 2019 at 12:45 pm
Thanks for the guide – it was very useful